Dessert
Bibingka (Rice Cake) with Salted Egg and Coconut
Original name: Bibingka with Salted Egg and Coconut
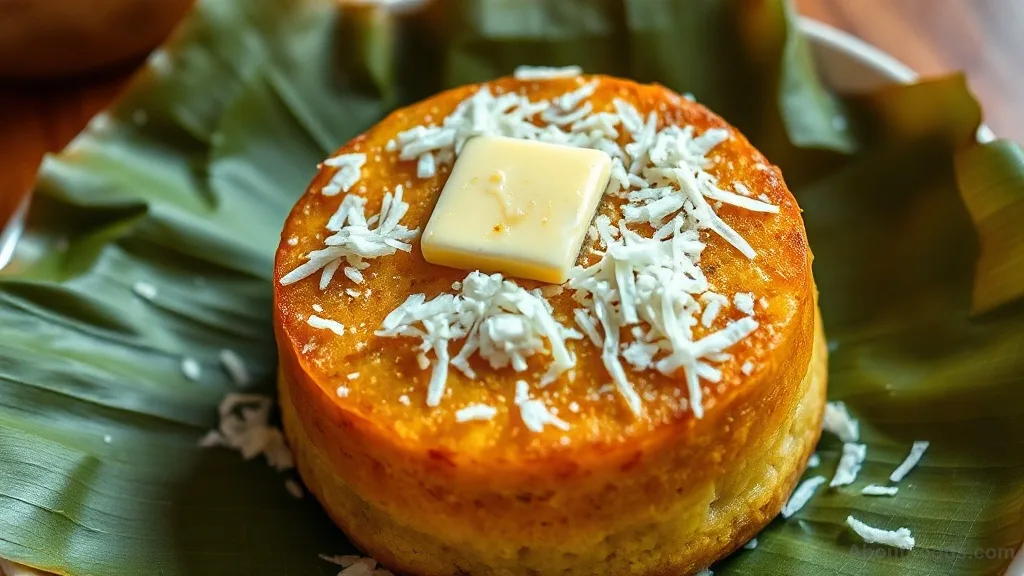
About this dish
A nostalgic Filipino rice cake that my Lola always made for Christmas morning, this bibingka is soft, slightly chewy, and fragrant with coconut. Topped with salty-savory salted egg and a sprinkle of cheese, it’s the perfect balance of sweet and salty.
The charred, slightly crispy edges are my favorite part—it’s like a warm hug from home.
Ingredients
UK and US measurements are both included for every recipe.
glutinous rice flour
grain200 g
Imperial measurement: 1 1/2 cups
baking powder
other1 1/2 tsp
salt
spice1/4 tsp
granulated sugar
other100 g
Imperial measurement: 1/2 cup
coconut milk
dairy240 ml
Imperial measurement: 1 cup
water
liquid120 ml
Imperial measurement: 1/2 cup
butter (melted)
fat60 g
Imperial measurement: 4 tbsp
salted egg (sliced)
protein2
grated cheese (optional)
dairy30 g
Imperial measurement: 1/4 cup
grated coconut
fruit1/2 cup
butter, for brushing
fat30 g
Imperial measurement: 2 tbsp
Method
Prepare the batter
5 minIn a large bowl, whisk together the glutinous rice flour, baking powder, salt, and sugar. Pour in the coconut milk, water, and melted butter, and whisk until smooth and well combined. The batter should be thin enough to pour but slightly thick.
Rest the batter
10 minLet the batter rest for 10 minutes. This allows the rice flour to hydrate and gives the bibingka a softer texture.
Preheat the oven
5 minPreheat your oven to 190°C (375°F). If you have a gas oven, you can use the top rack to get that nice charred top.
Prepare the pans
5 minLine muffin pans or small ramekins with banana leaves if you have them (this adds a lovely aroma), or lightly grease them with butter. If using banana leaves, wilt them briefly over a flame or in the oven to make them pliable, then cut into squares that line the cups.
Fill the pans
1 minPour the batter into the prepared cups, filling each about 3/4 full. Tap the pan gently on the counter to release any air bubbles.
Add the toppings
1 minPlace a slice of salted egg on top of each bibingka. If using cheese, sprinkle a little grated cheese over each.
Bake
25 minBake for 20-25 minutes, or until the edges are golden and a toothpick inserted into the center comes out clean. If you want a charred top, switch to the broiler for the last 2-3 minutes, watching carefully so it doesn't burn.
Brush and serve
3 minRemove from the oven and immediately brush the tops with butter. Sprinkle with grated coconut while still warm. Serve warm, preferably the same day, though they're still delicious reheated.
Equipment
- Muffin pan or ramekins
- Banana leaves (optional)
- Mixing bowls
- Whisk
- Measuring cups and spoons
Nutrition facts
Tips
- Look for 'glutinous rice flour' (also labeled as sweet rice flour or malagkit) because it gives bibingka its signature chewy texture. It is not the same as regular rice flour.
- If you don't have banana leaves, you can skip them—just grease the pan well. But the leaves add a subtle smoky, earthy aroma that's hard to replicate.
- To get the charred spots that are authentic to bibingka, place the muffin pan under the broiler for the last few minutes, but keep a close eye so the tops don't burn.
- Leftover bibingka can be refrigerated for 2-3 days. Reheat in the oven or toaster, not the microwave, to keep the edges crisp.
Serving suggestions
- Serve warm as a snack or dessert, traditionally enjoyed during the Christmas season, often with a cup of salabat (ginger tea) or strong coffee. It's also lovely as a sweet breakfast treat.
Rate this recipe
No ratings yet. Be the first to rate it.

Recipe by
Miguel Santos
Specialises in Filipino cuisineMiguel learned adobo from his Lola and added a twist: coconut milk AND cane vinegar. He is now considered a folk hero in Manila.
Describe yourself in three words: Proud, nostalgic, talks about his Lola a lot.